


")


")


 kit Stainless")

")


 Long")
Engine bearing installation guide
12 step guide. How to install engine bearings.
These are just tips and in the slightest uncertainty, an experienced mechanic should always handle this type of job.
1. Sort matching caps.
Make sure the connecting rod and main bearing caps are properly marked before removal.
Caps are individually matching at their specific location and must not be mixed. Cap 1 must always be in that place. It can not be twisted either. This is important as premature engine wear will occur.
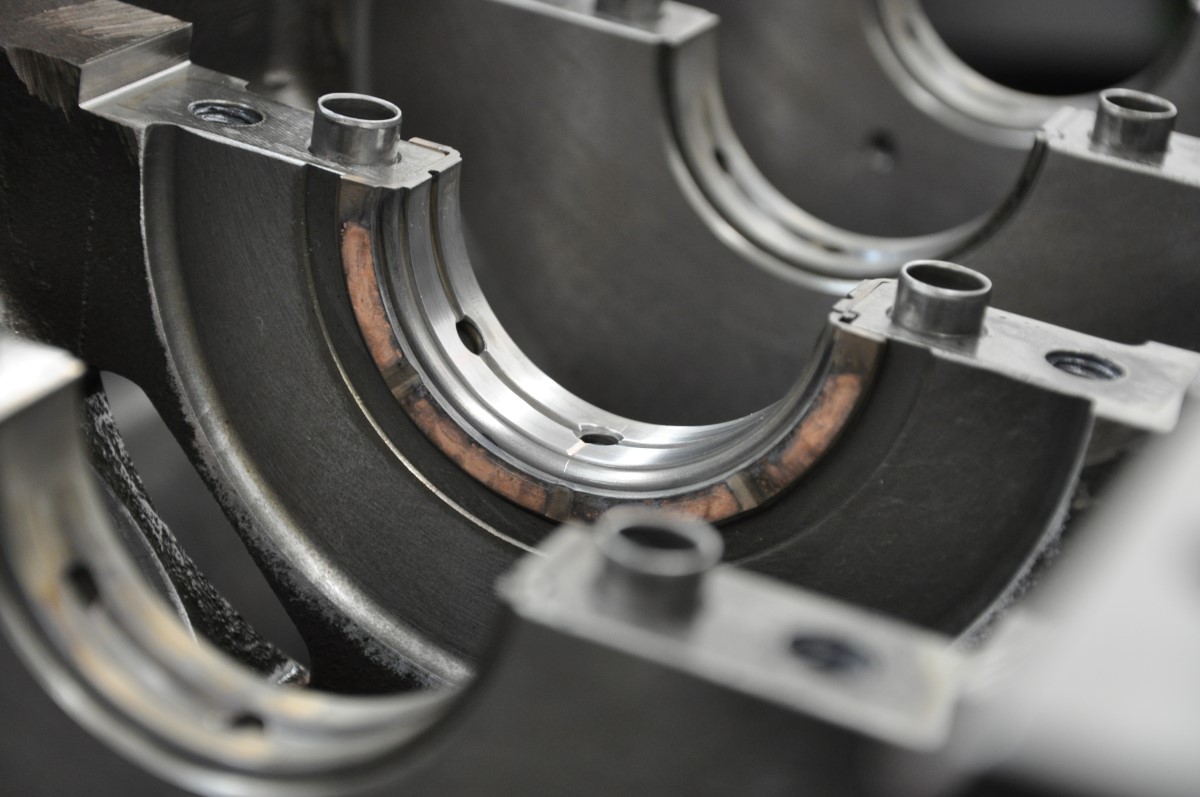
2. Housing bore check
When changing bearings, bearing seat condition are important to check as dirt and damage that has arisen is easily missed. This surface can easily be prioritized down as it is not exposed to the moving parts. But this surface is of the highest interest as it is the basis for how well the bearing is mounted and how even pressure distribution the bearing get.
When the crankshaft and crankshaft caps are mounted with the correct tightening torque, checks must be performed on:
- Size
- Surface
- Roundness
- Taper
Do not forget to check the mounting surfaces of any thrust bearings.
3. Crankshaft journals
Just as the bearing seat caps are checked the crankshaft should be checked:
- Size
- Surface
- Roundness
- Taper
4. Keep it clean
An industrial wash of the engine parts is standard, but do not forget to remove all the debris in oil passages. When new bearings are fitted and any dirt is released, damage can easily occur to bearings and other parts.
Therefore, clean oil passages with a brush / pipe cleaner and use compressed air and water to then clean out the last particles.
5. Bearing installation
When the above points are done, we can start assembling each bearing in its place. Carefully note how the old bearings have been seated so that nothing is turned wrong or not clicked in place properly.
6. Extra checks
Make sure that all bearing grooves are firmly in place. And that the outlet for the oil holes aligns with the oil hole of the engine block.
7. Oil primer
When all bearings are mounted correctly in their places, it is time to lubricate them with oil or a primer. This is to get an oil film between the bearing and the crankshaft so that no damage occurs when rotating the crankshaft during installation.
8. Crankshaft installation
When the engine block is in the engine stand and the lower part is facing upwards, it is time to start mounting the crankshaft. The crankshaft is carefully lowered into place and each bearing cap is mounted back in the place they had from the beginning. Check that no dirt or other prevent perfect crankshaft fit.
9. Main bearing cap torque
Handle the bolts for the crankshaft bearings according to the manufacturer's recommendations to obtain the correct tightening torque. If a separate thrust bearing is used, press the crankshaft against it so that it settles in position correctly. Then torque the main caps one by one according to the OEM procedure, which usually starts from the middle and works its way in a circle outwards. Check that the crankshaft can be rotated freely before tightening the bolts. Also check rotation after each cap is torqued. If the crankshaft not turn freely after a main cap has been torqued, something is wrong. This should not happen. The crankshaft should rotate as easily after tightening as before. Check the correct bearing clearance before further installation.
10. Crankshaft axial clearance
Check that crankshaft axial play is within tolerance.
Push the crankshaft forward max. Then measure with a micrometer how far back you can pull the crankshaft. This can also be measured with blade gauge.
11. Connectiong rod installation
When connecting rods and pistons are assembled together, they can be pushed down into the cylinder bore so that the rod make contact with the crankshaft. Note any asymmetrical properties of connecting rods or pistons if they are to be turned in a specific direction. This is usually marked.
Handle the bolts for the crankshaft bearings according to the manufacturer's recommendations to obtain the correct tightening torque. A blade gauge can be used between the connecting rod and the crankshaft so that the connecting rod does not twist and damages the rod bearings during tightening.
Check that the crankshaft can be rotated freely before and after the bolts have been tightened. The crankshaft should rotate just as easily after tightening as before. If not something is wrong. Same as step 9.
12. Engine priming
Before start, you want to build up oil pressure with new fresh oil so all bearings are completely lubricated. This is done with an external pump or by manually running the original oil pump with a drill.
▼
-
Engine and tuning
- Crankcase ventilation Information
- Engine block: Parts and how they fit together
- Engine deck clearance
- Head gasket - Information
- Engine bearing installation
- Engine bearing Information
- Blow off valve: Information and assembly
- Electronic Throttle Housing - DBW Information
- Noise from engine - Troubleshooting
- ARP bolts: Material and specifications
- Assembly of connecting rods
- Automotive cooling system problem
- Engine cooling system [How does it work?]
- Engine Oil system
- Engine water pump
- Exhaust pipe: Which material should you choose? [+extra information]
- Exhaust system: Parts and assembly
- Exhaust values - Information
- Exhaust wrap
- Intercooler guide
- Oil cooler - Information and FAQ
- Piston ring installation TIPS
- What do notes on Wiseco & JE pistons mean?